

 Justin
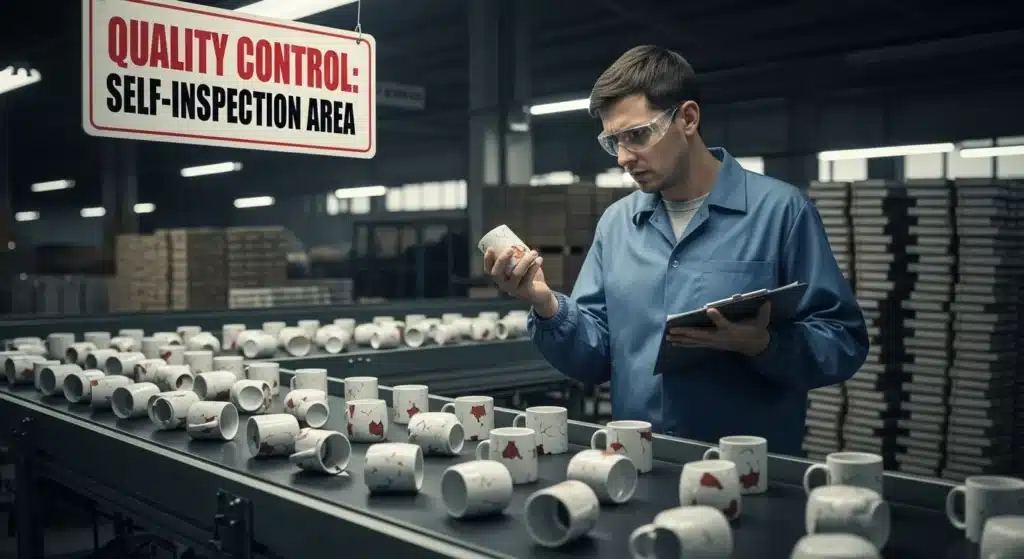
Relying on factory self-inspections is a proven way to receive defective goods. Research shows these internal checks can miss 37% of major deficiencies, leaving you to manage costly recalls and damaged customer trust.
This guide provides the actionable framework you need to take control. We detail the AQL standards that define acceptable defect levels, explain the four critical inspection stages from pre-production to loading, and show you how to build a bulletproof checklist. You’ll learn why a third-party inspection typically costs $200-$350 per day and how to classify defects from critical to minor to protect your shipments.
Why You Can’t Trust Factory “Self-Checks”
Factory self-inspections often fail due to manipulated sampling, where defective items are replaced to report perfect results, and measurement discrepancies from using different tools. Research shows these checks can miss critical defects, with one study finding 37% major and 9% critical deficiencies in GMP self-audits. Independent validation is essential to avoid these engineered gaps in quality reporting.

The Three Flaws in Factory Self-Check Systems
Factory self-check systems are built on a foundation that can be easily compromised. The primary flaws are sampling manipulation, measurement inconsistency, and fraudulent reporting.
In a typical case of sampling manipulation, a factory might test 10 pieces from a lot. If 8 pass and 2 fail, the failed items are simply discarded and replaced with known-good units. The final report then shows a 100% pass rate, completely masking the true 20% defect level present in the initial sample.
Measurement inconsistency occurs when factories use different—often less precise—testing tools than those specified by the buyer. A factory may claim 100% conformance using its internal equipment, but an independent test with a calibrated Fluke cable tester could find 15% of the items are defective.
Fraudulent reporting is the most direct form of deception. This includes fabricating test data from non-existent procedures or claiming to use calibrated equipment that is not present on the factory floor. To counter this, buyers must conduct direct audits of the actual testing processes and review physical calibration records.
Data and Consequences: Why Self-Checks Fail in Practice
The failure of self-inspections is not theoretical; it is well-documented with concrete data that reveals significant operational risks.
An analysis of Good Manufacturing Practice (GMP) audit data across 99 reports from 19 countries found that self-inspections systematically missed problems. Internal checks failed to identify 37% of major deficiencies and 9% of critical deficiencies, creating a dangerous gap in oversight.
The risk extends to external inspections as well. Research shows that when the same investigator visits a plant multiple times, the hazard of a product recall increases—by 21% on the second visit and 57% on the third. This “familiarity effect” reduces inspection rigor, a risk that can be mitigated by rotating inspection teams.
Common retesting protocols also hide batch-level risks. For example, if 10 pieces are tested and 1 fails, a single retest might allow that marginal part to pass. This practice can conceal a potential 10% nonconformance rate for the entire batch, representing a significant quality and safety hazard that goes unreported.
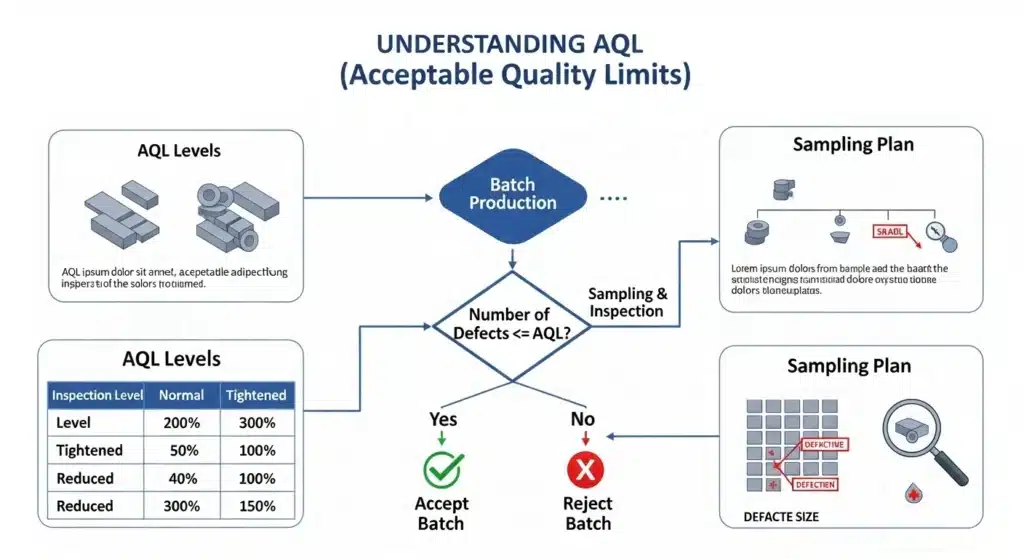
Understanding AQL (Acceptable Quality Limit)
AQL (Acceptable Quality Limit) is the maximum tolerable defect percentage in a production lot, determined via random sampling under standards like ISO 2859-1. It defines accept/reject thresholds based on lot size, inspection level, and defect severity—critical (0%), major (0.1%-2.5%), and minor (2.5%-4.0%)—balancing inspection cost with risk control.
| Defect Classification | Typical AQL Range | Example |
|---|---|---|
| Critical | 0% | Safety risks like electrical shorts or structural failure. |
| Major | 0.1% – 2.5% | Functional failures like a non-working button. |
| Minor | 2.5% – 4.0% | Cosmetic flaws like minor scratches or color inconsistencies. |
What AQL Is and Why It Matters
AQL is not a guarantee of zero defects. It is a statistical limit that defines the worst quality level a buyer will tolerate in a random sample taken from a production lot.
This system protects buyers by providing a clear, objective standard to accept or reject shipments, moving beyond subjective factory self-checks. It balances two key risks: the supplier’s risk of a good lot being rejected and the buyer’s risk of a bad lot being accepted. This balance is visualized using Operating Characteristic (OC) curves.
The application of AQL is driven by classifying defects. Critical defects pose safety hazards and have a strict AQL of 0%. Major defects affect function and typically use an AQL between 0.1% and 2.5%. Minor defects are cosmetic and allow for a higher AQL, usually between 2.5% and 4.0%.
How an AQL Inspection Works: Standards and Sample Sizes
The inspection process follows the international standard ISO 2859-1, which provides sampling tables. An older but similar standard is MIL-STD-105E. The process begins by determining the lot size and selecting an Inspection Level, with Level II being the general default.
First, the lot size and inspection level are used to find a sample size code letter from the standard’s tables. For instance, a lot of 2,000 units at Level II corresponds to code letter ‘K’. This code letter, combined with the chosen AQL value for each defect class, points to the required sample size and the acceptance and rejection numbers.
For example, for a lot of 5,000 units with an AQL of 1.0%, you would inspect 200 randomly selected units. If 5 or fewer defects are found, the lot is accepted. If 6 or more defects are found, the lot is rejected.
AQL values are applied separately for each class of defect. In a scenario with an AQL of 2.5% for major defects and 4.0% for minor defects, and a sample size of 200 units, you might accept the lot if it contains 10 or fewer major defects and 14 or fewer minor defects.
The 4 Types of Inspections (Pre-Prod to Loading)
A complete QC strategy uses four sequential inspections: Pre-Production (PPI) checks raw materials, During Production (DUPRO) catches process errors early, Pre-Shipment (PSI) validates finished goods, and Container Loading Supervision (CLS) secures logistics. This chain turns quality control into a series of auditable gates.

The Four-Stage Inspection Framework
The four canonical QC inspections form a time-based framework to manage risk from raw materials to the shipping container. Each stage serves a distinct purpose and acts as a quality gate.
Pre-Production Inspection (PPI) acts as an incoming quality gate for raw materials and components, verifying specs before production starts. It functions as Incoming Quality Control (IQC), checking dimensions, weight, color, transport damage, labeling, packaging, and specification compliance before materials enter the production line.
During Production Inspection (DUPRO) is scheduled when 20-60% of the order is complete to detect workmanship or process issues while correction is still possible. This timing provides a statistically meaningful sample of work-in-progress, allowing factories to adjust tooling, methods, or operator practices before the full production run is complete.
Pre-Shipment Inspection (PSI) is the final commercial acceptance check on 100% finished goods, using statistical sampling (AQL) to decide if the lot can ship. Conducted when goods are 100% finished and at least 80% packed, it focuses on appearance, dimensional tolerances, functionality, safety, packaging, and labeling against the product specifications.
Container Loading Supervision (CLS) verifies the correct product mix, packaging integrity, and container condition during loading to prevent last-mile errors. It confirms product type, SKU mix, quantities, barcodes, palletizing, container condition, and sealing to protect against damage, mix-ups, and fraud after the goods have passed final inspection.
Execution and Practical Application
Each inspection stage involves specific checks and methods tailored to its point in the production timeline. The practical application turns the framework into actionable control points.
PPI checks include dimensions, weight, color, material certificates, and transport damage for components like fabric, electronics, or hardware. This incoming verification ensures that production begins with conforming inputs, mitigating input risk from suppliers.
DUPRO focuses on assembly quality, tooling settings, and early-stage defects, allowing factories to adjust processes before the full run is complete. Inspectors look for process drift and workmanship issues, providing feedback that can correct the manufacturing process in real-time.
Final Random Inspection (FRI) under AQL plans involves visual checks, functional tests, and packaging/label verification on a statistically sampled portion of the order. Instead of 100% checking, this method uses acceptance sampling plans to make a lot acceptance decision, efficiently estimating defect rates for the entire shipment.
CLS involves supervising pallet patterns, verifying SKU quantities against packing lists, checking container condition for damage or moisture, and applying a tamper-evident seal. This final step secures logistics integrity, ensuring that the correct, undamaged goods are loaded into a sound container for transport, closing the loop from pre-production to loading.
Across all four stages, inspectors perform a core set of activities: visual inspection, dimensional measurement, functional testing, and packaging/label checks. These are often supported by statistical process control (SPC), acceptance sampling, and control charts. The outcome is a chain of discrete, auditable control points evidenced by stage-specific inspection reports, checklists, and sampling records.

Creating a Bulletproof QC Checklist
A bulletproof QC checklist is a controlled document that translates design and customer specifications into measurable inspection points. It replaces subjective judgments with quantitative criteria like dimensional tolerances, material specs, and defect classifications. The checklist also mandates specific inspection methods, required documentation, and clear responsibilities to create a complete audit trail.
| Checklist Component | Purpose | Example / Requirement |
|---|---|---|
| Quantitative Acceptance Criteria | Replace qualitative notes with measurable pass/fail limits. | Length tolerance within ±0.1 mm, specific torque values, operating limits. |
| Defect Classification | Objectively categorize flaws based on safety and function. | Critical, major, and minor classes for issues like sharp edges or structural instability. |
| Inspection Method & Traceability | Define how to check and who is responsible, creating an audit trail. | Specify visual, gauge, or functional test. Mandate signatures, dates, and hold points. |
| Reference Documentation | Link checklist items to authoritative source documents. | Drawings, material specs, standards like UL markings, or Pantone color codes. |
| System Controls | Embed quality system infrastructure into the inspection process. | Require CoCs, calibrated equipment, qualified procedures, and defined inspection stages (incoming, in-process, final). |

The Core Components of a Professional Checklist
The foundation of a reliable checklist is its transformation of specifications into actionable, unambiguous inspection points. Each component is designed to eliminate guesswork.
First, it translates design bases and customer requirements into discrete, measurable acceptance criteria. This means specifying exact values, such as a length tolerance within 0.1 mm or a required torque setting, instead of relying on vague terms like “properly assembled.”
For visual and cosmetic inspections, the checklist defines clear defect classifications—critical, major, minor—based on their impact on safety and function. This guides inspectors to focus on issues like sharp edges, splinters, or debris that could compromise the product.
Every item must specify the exact inspection method: visual examination, measurement with calibrated gauges, a functional test, or a software test. This ensures consistency across different inspectors and shifts.
To create a verifiable audit trail, the checklist mandates inspection hold points and requires signatures from the responsible person, along with the date. This traceability is non-negotiable in regulated industries.
Finally, all criteria must reference the underlying standards, drawings, and specifications. This could include requiring a UL marking for an electrical component, a specific voltage rating, or a color verified against a Pantone code, tying every check back to its source document.
Integrating Documentation and System Controls
A bulletproof checklist does not exist in isolation; it is a gateway into the broader quality management system. It mandates the specific documentation required for verification, creating a paper trail that supports the inspection result.
This includes calling for Certificates of Conformance (CoC), material lot numbers, inspection and test records, and chemical or physical test results from suppliers. The checklist verifies that this evidence exists and is correct.
It also requires that all measuring and test equipment used is calibrated, with its calibration status and frequency documented. An inspection result is only as reliable as the tool used to obtain it.
Following high-reliability frameworks like NUREG‑1536, the checklist links items to controlled written procedures and personnel qualifications. It specifies the inspection stage—whether it’s for incoming materials, an in-process check, or final product verification.
For product requirements, it details weight, dimensions, material construction, and mandatory labeling. For in-process checks, it includes measurable controls like feature dimensions, torque values, and machine parameters monitored during production. This integration ensures the checklist is a living part of the quality system, not just a piece of paper.
What Happens When Defects Are Found?
When a defect is found, it is immediately logged with a unique ID, classified by type and severity, and a disposition decision is made. This is followed by a root cause analysis to prevent recurrence, with corrective actions implemented to fix the underlying process issue.

The Defect Logging and Classification Process
The moment a defect is detected, a structured documentation process begins. Each issue is assigned a unique identifier and logged with critical details such as its source, the detection date, and the responsible inspector. This creates an auditable trail for traceability and compliance verification, often supported by digital platforms that standardize reporting and automate escalation across different facilities.
The defect is then classified. Common categories include Surface flaws (like scratches or discoloration), Dimensional errors (outside tolerance specifications), Functional failures, Material compromises, and Assembly issues. Simultaneously, the severity is assessed—typically as Critical, Major, or Minor—which directly informs the subsequent disposition decision: Pass, Rework, or Reject. Attachments such as photographs and test data are linked to the log to provide clear evidence and context.
Root Cause Analysis and Corrective Actions
After a defect is logged and a disposition is decided, the focus shifts to understanding why it occurred. Root Cause Analysis (RCA) methods, such as the 5 Whys technique and Fishbone Diagrams, are employed to drill down past symptoms to the fundamental source. Tools like Pareto Charts apply the 80/20 rule to identify the vital few causes responsible for the majority of quality issues, ensuring efforts are targeted effectively.
The insights from RCA drive corrective actions. These are not just about fixing the single defective unit but about improving the process to prevent recurrence. Actions may include standardizing work procedures, retraining employees, recalibrating equipment, or applying lean manufacturing techniques to eliminate waste. This proactive approach is critical, as the cost of fixing a defect increases exponentially the later it is found in the production cycle. Supporting this entire quality management system are standards like ISO 2859-1 for consistent sampling and tools like Statistical Process Control (SPC) for real-time monitoring to catch process deviations before they result in defects.
Remote Inspection Tools (Video/Live)
Remote inspection tools use live video feeds from devices like video borescopes or smartphones to let you see inside machinery or production lines from anywhere. This technology provides high-resolution imaging and real-time collaboration features, reducing the need for on-site travel while maintaining detailed oversight of quality.

How Remote Visual Inspection Works
Remote visual inspection (RVI) uses live video streams from devices like video borescopes, tablets, or smart glasses to inspect hard-to-reach areas non-invasively. The primary goal is to enable real-time, ‘see-what-I-see’ collaboration between an inspector on-site and a quality manager or client remotely.
This approach reduces costs and delays associated with expert travel while providing immediate visual verification of production quality or machinery condition. Key features include high-resolution imaging, such as TrueSight™ clarity, and tools for live annotation and telestration to mark defects directly on the video feed.
Technical Requirements and Advanced Capabilities
A stable internet connection with a minimum bandwidth of 100kb/s (3G+ or Wi-Fi) is required for reliable real-time video streaming; a personal internet dongle is recommended in remote factory locations. Devices like the Everest Mentor Flex video borescope offer a 3-hour battery life and extended probe articulation for comprehensive internal inspections.
Advanced software enables features like Real3D Stereo Measurement for creating 3D point clouds of defects and automated data upload to cloud platforms like InspectionWorks. Workflow efficiency is boosted by tools that allow 300% faster annotation via touchscreens and Menu Directed Inspection (MDI) for auto-tagging images and generating reports.
Cost of Third-Party vs. Agent QC
Third-party QC firms typically charge $200–$350 per man-day for an 8-hour inspection, leading to costs of $360 or more per visit. Sourcing agents often cost less per hour, around $8–$25, but their pricing is less transparent and their inspections may lack the objectivity and standardized methodology of an independent firm.

The Third-Party Inspection Cost Model
The standard pricing unit for professional quality control firms is a ‘man-day,’ defined as roughly 8 hours of on-site inspection work plus travel time. In major Asian manufacturing hubs like China, all-inclusive rates typically range from $200 to $350 per man-day.
For example, a standard pre-shipment inspection for apparel often requires 1.5 man-days, resulting in an average cost of about $360 per inspection. When scaled across a large program, these costs add up significantly. One retailer’s annual spend on third-party inspections rose from $1.8 million to $2.88 million after expanding its coverage.
Agent-Based QC: Pricing and Hidden Costs
In contrast, agents or dedicated inspection staff are often priced on a per-hour or per-month basis, not per inspection. A benchmark for a dedicated agent seat from a BPO model is $8 to $25 per hour of agent time.
While this can appear cheaper per visit, this model introduces significant trade-offs. Agents frequently have conflicts of interest, as they may prioritize maintaining factory relationships over strict quality enforcement. Furthermore, agent-led inspections often lack the structured, standards-based methodologies—like statistically valid AQL sampling—that define professional third-party inspections, which increases the risk of defective shipments reaching your customers.
Final Thoughts
Effective quality control in China hinges on moving beyond reliance on factory self-checks. The documented flaws—from manipulated sampling to fraudulent reporting—demonstrate that independent validation is not optional. By implementing a structured approach with clear standards like AQL, a sequential four-stage inspection framework, and bulletproof checklists, you transform quality from a subjective claim into a series of measurable, auditable gates.
The choice between third-party inspectors and sourcing agents ultimately reflects a trade-off between cost and control. While agents may seem cheaper, the objectivity, standardized methodology, and conflict-free reporting of a professional firm provide a stronger defense against defective shipments. Integrating these tools—from on-site AQL inspections to remote video verification—creates a resilient system that manages risk from raw materials to the shipping container, protecting your brand and your bottom line.
Frequently Asked Questions
What is the AQL 2.5 standard?
The AQL 2.5 standard is the Acceptable Quality Level defined in ISO 2859-1, representing a 2.5% defective rate as the worst tolerable average for acceptance during lot-by-lot inspection. It’s commonly applied to major defects, meaning a maximum of 10 defects might be allowed in a sample of 200 units for certain lot sizes.
How much does a third-party inspection cost?
A third-party product inspection typically costs between USD 200 and 400 per inspector-day for standard consumer goods in major manufacturing regions. For smaller orders, a flat fee of USD 600 to 900 per order is common for a one-day on-site visit.
Can I inspect goods via video call?
Yes, Remote Video Inspection (RVI) is a standard industry practice. It requires only a modern smartphone or tablet and an internet connection with a bandwidth greater than 100kb/s to stream a live video feed from the factory or warehouse.
What if the supplier refuses to replace defective goods?
If a supplier refuses to replace defects, the buyer can enforce the replacement or repair at the supplier’s expense based on the purchase order terms. This process includes formal corrective action requests. Failure to comply can lead to withheld payments, cost recovery, or disqualification of the supplier.
Do I need 100% inspection or random sampling?
For routine production, random sampling using standards like ANSI/ASQ Z1.4 is standard. 100% inspection is typically reserved for critical safety items, very low production volumes, or when a manufacturing process is not yet proven to be stable and capable.
What is a ‘Golden Sample’?
A Golden Sample is the final, approved production sample that serves as the definitive benchmark for quality, appearance, and function. It is made using the exact same processes and materials intended for mass production. Multiple copies are usually kept by both the buyer and the supplier for reference during inspections.